Lastly, some features from older versions of Windows are good enough to keep as-is in newer version. One example of this is the backup options. In this article, I’m going to talk about the built-in backup features in Windows 10 and how it’s a blend of new Windows 10 features and old Windows 7 backup options.
In a way, it’s a good thing that you still have all the options you had before, but it’s also more confusing, just like having IE 11 and Edge installed at the same time.
Windows 7 Backup Options in Windows 10
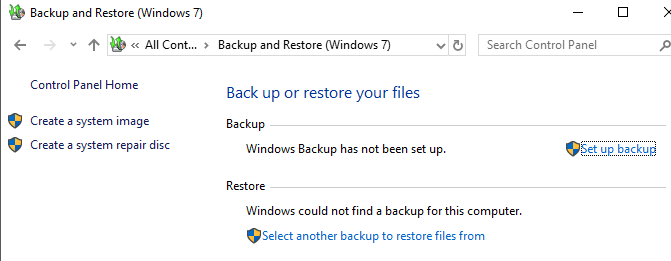
In Windows 10, you can still do everything you were able to do in Windows 7 in terms of backups and recovery. If you go to the Control Panel, you’ll see an option called Backup and Restore (Windows 7).
The dialog that pops up is pretty much the same one you see in Windows 7. You can Create a system image, Create a system repair disc, Set up backup or restore a backup if there is one available.
If you click on
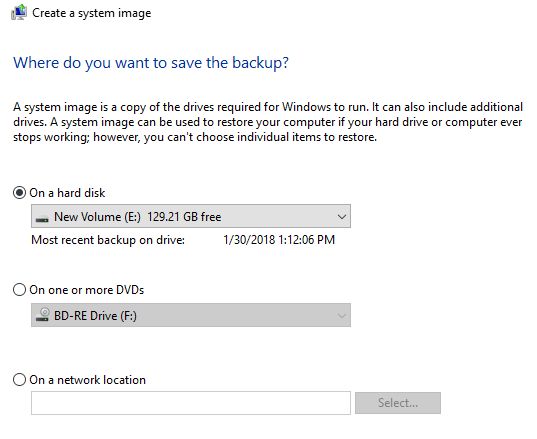
Create a system image, you’ll have a choice of where you want to save the image. Only on Windows 10 Pro and Windows 10 Enterprise can you save the system image to a network location.
Note that you cannot save the system image to any drive that is included in the system image. Creating a system image this way is a manual process. If you want to have it done automatically, you need to choose the Set up backup option.
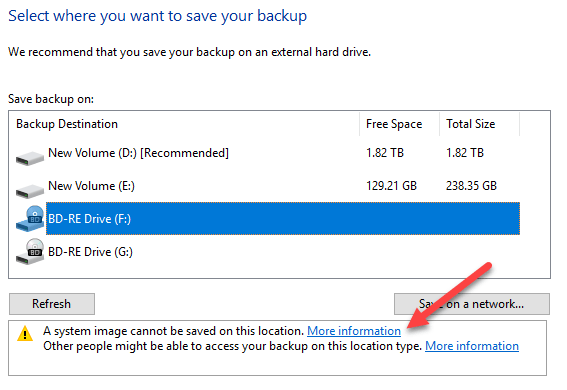
This is the same as Backup and Restore in Windows 7. Basically, you choose where you want to save the backup to and then pick a schedule. The only thing you have to note is that you cannot create a system image if you backup to DVD. You have to backup to a hard disk or network location in order to have that option otherwise it’s greyed out.
By default, the system images are saved in the following format, where X is the drive you choose.
X:\WindowsImageBackup\PC_Name\Backup YYYY-MM-DD HHMMSS
For example, if I chose to save the system image to an external hard drive (E:), then I the location of the backup would be:
E:\WindowsImageBackup\AseemPC\Backup 2018-10-04 083421
Backup Restore Options in Windows 10
There are two ways to recover data from your backups in Windows 10. If you created a system image, then you have to boot to System Recovery Options in Windows 10 to restore the image. If you backed up using the schedule feature and picked files and folders, you can restore the files/folders from within the Backup and Restore (Windows 7) dialog.
Click on the Restore my files button and then you can go ahead and selectively choose which files you want to restore from the backup.
For restoring the system image, it’s a different procedure. Note that restoring a system image is a full restore, meaning that you can’t pick and choose what you want to restore; everything will be wiped out and replaced with the image. Restoring from a normal Windows backup allows you to restore individual files and folders.
Then click on Advanced Options.
Then go ahead and click on System Image Recovery.
Next, you’ll have to choose an account and type in the password for that user account. You’ll then have the option to restore from the latest system image or choose a specific image, which you would do if you had the system image saved to an external USB hard drive, a network location or a DVD, for example.
Once you have selected the image, you’ll have several options on how to restore the image to your computer. Note that you can only restore to a disk that is the same size or larger than the disks included in the backup image.
Reset this PC in Windows 10
In addition to the options above, you can also use a new feature in Windows 10 called Reset this PC. This is basically like performing a repair install in Windows XP or Windows 7. All system files are replaced and you essentially lose all your programs and settings, but you data stays intact.
This is exactly what Reset this PC does, but it’s a lot easier and really just takes a couple of clicks. It also gives you the option to completely erase everything and start from scratch. This is click performing a full clean install of Windows 10.
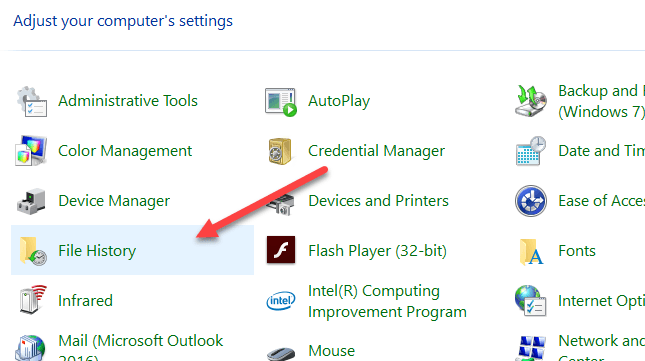
File History
In addition to all the Windows 7 backup and restore options, the Reset this PC option, you also have another new feature in Windows 10 called File History.
File History is turned off by default. Also note that if you are using a Windows 7 file backup with a schedule, File History cannot be enabled! You’ll see this message:
You have to turn off the schedule in order to use File History. This is kind of annoying since that means you’ll have to manually create system images if you like to have system images for your backups. Once you disable scheduled Windows 7 backups, you’ll see you now can turn File History on.
It’s suggested that you use an external drive or secondary hard drive for saving the file history instead of a local hard drive or partition. You can also use a network location if you like. Actually, you can’t even choose a location on the same physical disk for File History. This is one advantage File History has over Shadow Copies, which was a similar technology in older version of Windows. If the drive dies, you can reinstall Windows 10, give it the same name as the dead system and then choose the same location for File History as the dead machine.
Once you have chosen a location, the Turn on button will be enabled so you can click on it. That’s about it, FIle History is now on! So what does that mean and what does it do?
Well, it basically saves versions of the files stored in your libraries, favorites, contacts, and a few other locations like Music, Videos, Pictures and Desktop. If you go back to File History after it’s made some copies, you can click on the Restore personal files option.
You can now browse through to a specific file or folder and navigate back and forth in time using the green blue keys at the bottom of the screen. Here’s an example of a text document I created and edited with some text.
If I click the left arrow key, I’ll see version 2 of 3, which has a little bit less text than version 3 of 3.
Pressing the green circular arrow button will allow you to restore that version of the file:
You can replace the file, skip it or see some comparison info on the files. Unfortunately, it won’t actually compare the content of the files, just the date and other info like the size, etc. File History sounds pretty good, but it has some serious issues in my opinion and with a lot of other people too, apparently.
1. If you rename a file, the history for that file is lost. It basically starts from scratch again. So renaming a file is pretty much the same thing as deleting a file and starting over. The old history still exists, just with the old name.
2. Following from point one, if you create another file with the name of the original file, the histories will be joined! So if you delete a file that had a history and then you create a new file with that same name, you’ll get the history of the previously deleted file too.
3. Copies are made of the entire file each time a backup is done. So if you have a 500 MB file that gets changed three times in a minor way, you’ll have three 500MB copies of that file.
4. You can’t backup anything other than files and folders. You’ll still have to rely on Backup and Restore (Windows 7) for actually backing up your Windows 10 system.
5. You can’t include additional folders other than the ones pre-defined by Microsoft. This means if you want to use File History, you’ll have to move the data to one of the designated folders.
Overall, it’s all complicated system of backup options in Windows 10 that will most likely confuse new users. Hopefully, this article sheds some light on the different options, their advantages and disadvantages and how you can use them in combination to create a robust backup plan for your Windows 10 PC.